M12 Connector Assembly-The Complete Installation Process
- Share
- Issue Time
- Aug 14,2025
Summary
M12 connectors are a compact,rugged circular connector family widely used in industial automation, robotics, and sensing applications, This page provdes acomplete, field-ready instalation process for M12 connector assembly-coverng tools, cable prep,termination, sealing, torque specs, inspection and testingcombined with practical tips and product recommendations from Connoder
Introduction
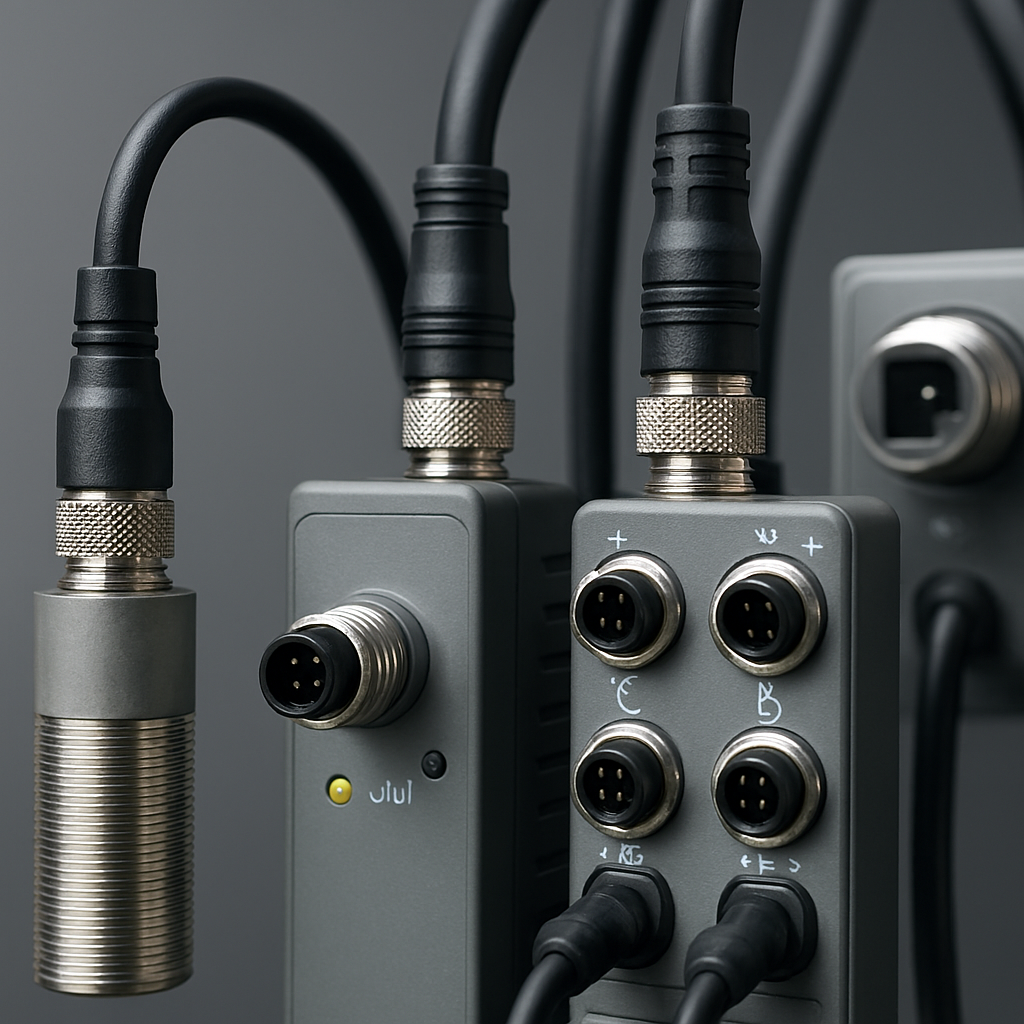
M12 connectors are a compact, rugged circular connector family widely used in industrial automation, robotics, and sensing applications. This page provides a complete, field-ready installation process for M12 connector assembly—covering tools, cable prep, termination, sealing, torque specs, inspection and testing—combined with practical tips and product recommendations from Connoder.
Tools & Materials Required
Prepare the following items before beginning assembly to ensure a fast, repeatable process and reliable results.
- M12 connector (field-wireable, panel mount, or overmolded assembly)
- Appropriate cable (shielded for Ethernet/sensitive signals; unshielded for simple sensor lines)
- Wire stripper & cutter; precision stripper preferred
- Crimp tool (for crimp contacts) or solder station (for solder-type contacts)
- Torque wrench (follow manufacturer torque specs)
- Seals/gaskets and lubricant for IP67/IP68 assemblies
Connoder's M12 product lines are engineered for compatibility with standard tools and field assembly workflows—reducing installation time while maintaining factory-grade performance.

Step-by-Step M12 Connector Installation Process
Step 1 — Cable Preparation
Cut the cable to length. Strip the outer jacket carefully according to the connector datasheet—retain adequate shield length if using shielded cable. Trim conductor insulation to the recommended strip length.
Step 2 — Contact Termination
Crimp contacts: use the specified crimp dies and inspect crimps for correct deformation and retention.
Solder contacts: use proper flux and temperature to avoid cold joints; keep joints neat and short.
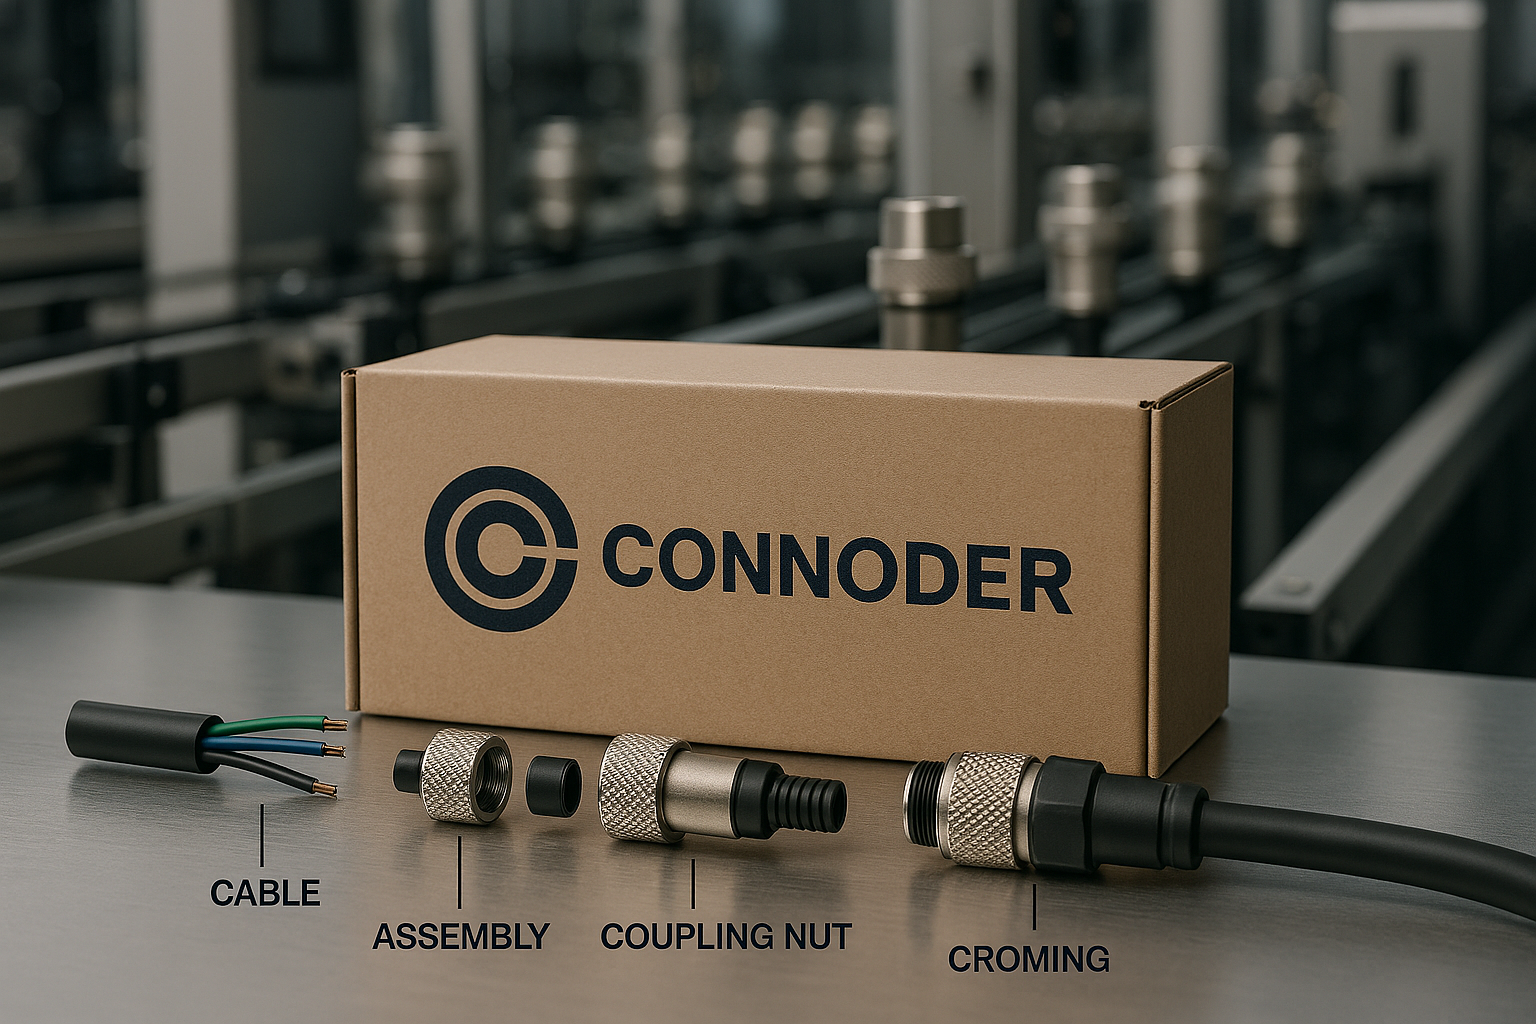
Step 3 — Housing Assembly & Sealing
Insert terminated contacts into the connector body until they click/seat. Fit the gasket or O-ring into place and ensure the sealing face is clean. Apply a thin film of compatible lubricant if recommended by the datasheet.
Step 4 — Final Tightening (Torque)
Use a calibrated torque wrench and tighten to the manufacturer's specification (typical example range: 0.4–0.6 Nm for many M12 couplers—always confirm with the connector datasheet). Avoid over-torqueing to preserve thread and sealing elements.
Step 5 — Inspection & Testing
Perform visual inspection for correct pin seating, no stray strands, and correct seal seating. Run continuity and insulation tests; for waterproof versions, carry out a sealing verification (e.g., spray or immersion tests per IP spec).

Best Practices for Reliable Performance
- Adhere to the correct coding (A / B / D / X) and pinouts to prevent mismatches for sensors, Ethernet and power lines.
- Maintain proper torque values to ensure vibration resistance without damaging threads or seals.
- Terminate shield properly to avoid ground loops—use ferrules or shield clamps as recommended.
- Minimize cable bending near the connector entry—use strain reliefs or overmolds in high-motion applications.
- Document each assembly batch and test results for traceability—especially for OEM and safety-critical systems.
Why Choose Connoder
Connoder delivers end-to-end industrial connectivity solutions—custom M12 cable assemblies, high-IP rated connectors, and support for large OEM programs. Our assemblies are produced under strict quality controls and comply with major industry standards (RoHS, CE, UL where applicable). For projects that require customization—lengths, coding, overmold, or labeling—Connoder provides rapid prototyping and global delivery options.
Downloadable Resources & FAQ
Get our printable assembly checklist and full installation PDF for offline use. (Link your internal PDF or a hosted file here.)
FAQ
A: Torque varies by manufacturer and connector code—commonly in the 0.4–0.6 Nm range for many M12 couplers. Always confirm with the connector datasheet supplied with the product.
A: Perform continuity/insulation checks, then carry out a sealing verification such as spray or immersion per the required IP class. For production runs, consider a sample batch immersion test.
A: Yes—Connoder specializes in custom cable assemblies and can deliver pre-tested, labeled M12 harnesses tailored to your specifications. Use the Request a Quote button above to start a conversation.